How to Email a Report

This article explains how to email a report to a customer from Service Intelligence.
STEP-BY-STEP FOR THE CLOUD-BASED APPLICATION
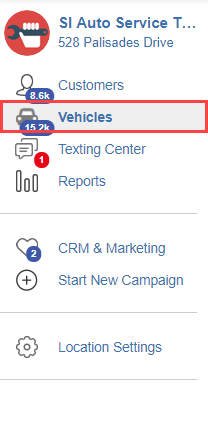
Left click Vehicles from column 1.
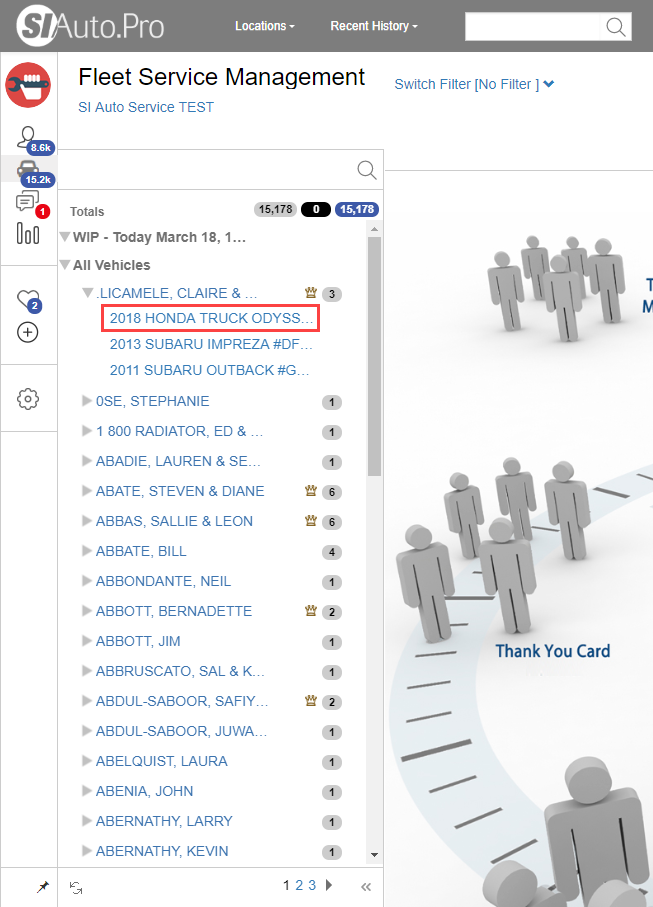
In column 2 there will be a list of all the customers and their vehicles in Service Intelligence's data base. Left click the name of the vehicle you want to send a report about.
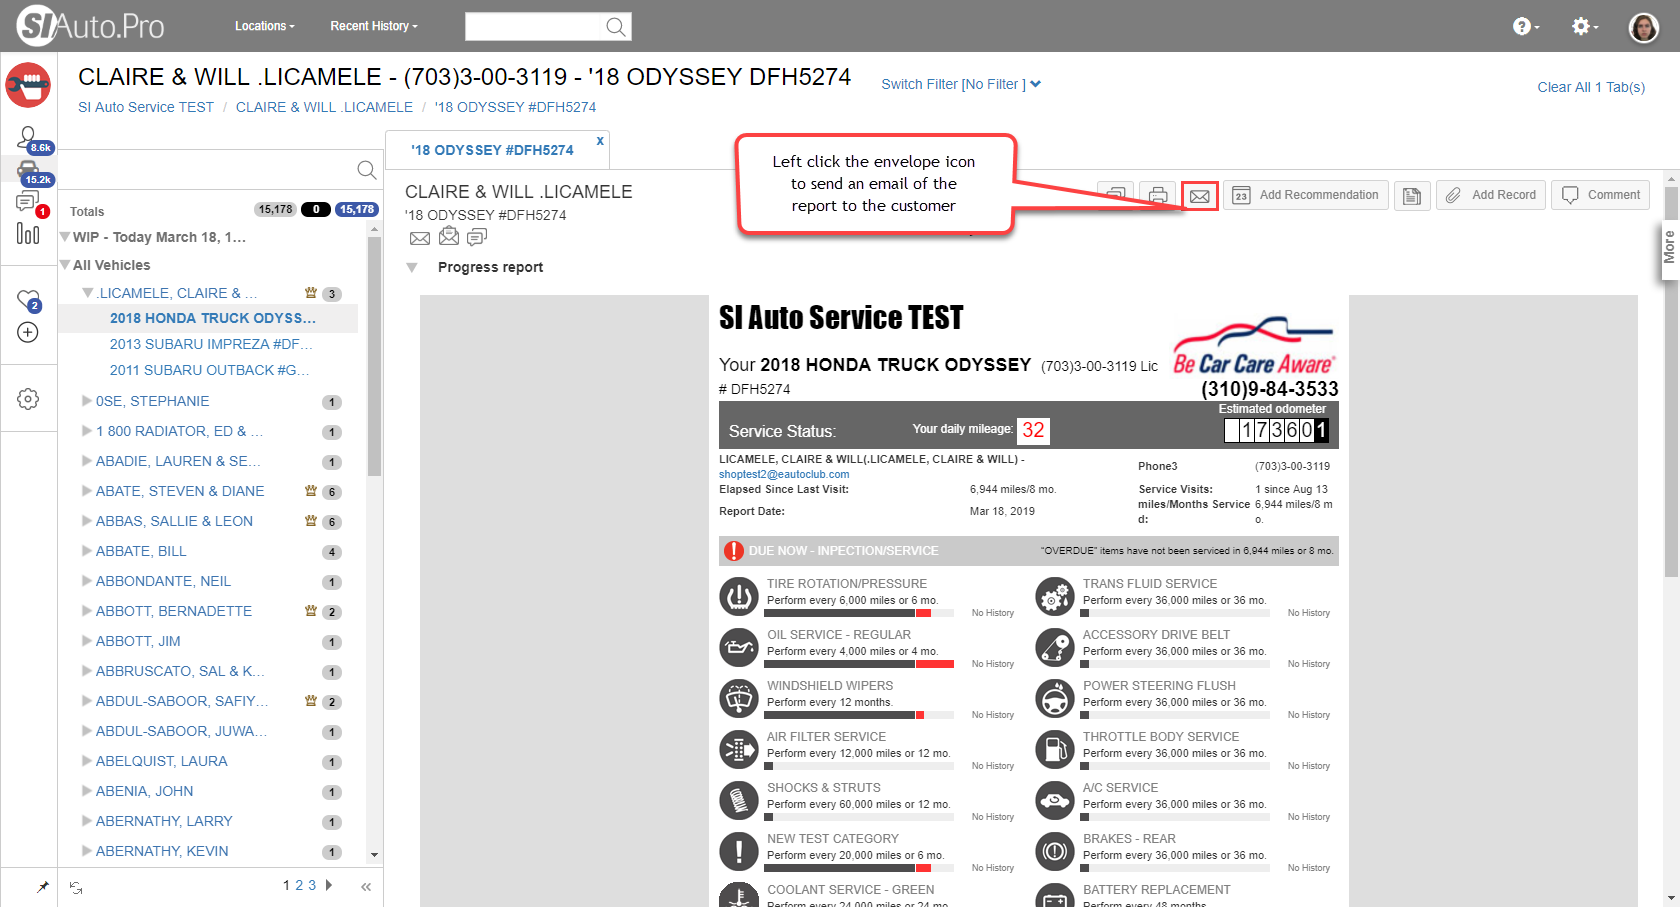
On the main page will be a new tab with the progress report for that vehicle (as the default report opened is the progress report). At the top right there will be an icon with an envelope on it. To send an email of the report to the customer, left click that icon.
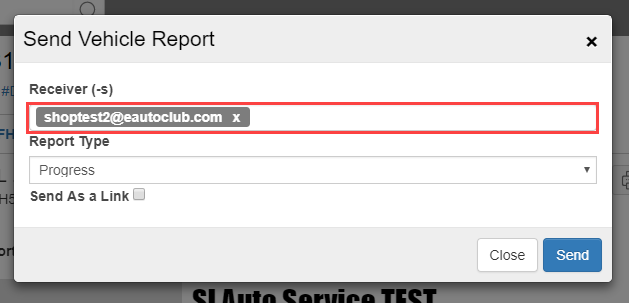
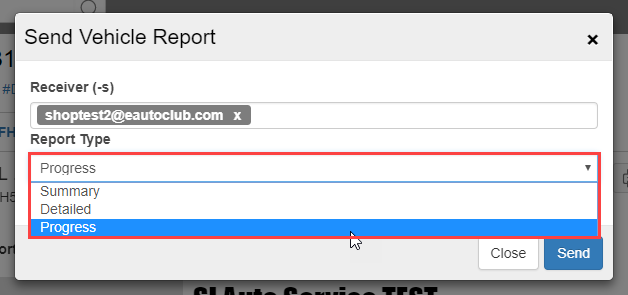
A dialogue box called Send Vehicle Report will open. The box under Receiver (-s) shows the recipients of the email. To add an additional recipient, type in the email address in that bar and press enter. To remove a recipient click the X in the gray box.
Under Report Type is a drop-down menu with the different report types you can send. Choose the one you want to send to the customer.
In column 2 there will be a list of all the customers and their vehicles in Service Intelligence's data base. Left click the name of the vehicle you want to send a report about.
On the main page will be a new tab with the progress report for that vehicle (as the default report opened is the progress report). At the top right there will be an icon with an envelope on it. To send an email of the report to the customer, left click that icon.
A dialogue box called Send Vehicle Report will open. The box under Receiver (-s) shows the recipients of the email. To add an additional recipient, type in the email address in that bar and press enter. To remove a recipient click the X in the gray box.
Under Report Type is a drop-down menu with the different report types you can send. Choose the one you want to send to the customer.
Once you have determined the recipients of the report, as well as the type of report to send, click the Send button.
STEP-BY-STEP FOR THE DESKTOP APPLICATION
From the list of customers under POS Service Tracking, left click the name of the customer whose vehicle report you want to send an email of.
Right click the name of the vehicle to open a menu from which to choose the report to email.
Left click the report you want from the menu.
The report type will open on the main page. Next, click the email icon from the menu ribbon at the top.
A dialogue box will open. Under Email Address there is a white box containing the recipient's email address. You can leave the default address as is, or you can delete what has been placed in there and type in a different one. If you check the box next to Save Email Address, this will save this address for this customer the next time you send out an email of their vehicle report.
Under Subject, you will see the default email subject for this customer. You can either leave it as is or you can type in a different subject. If you check the box next to Save Email Subject, this will save the email subject for the next time you send an email through this dialogue box.

This will change the subject for all the vehicle email.
When the email address and subject are finished, click OK to send out the email.
Need more help?
You can always ask an expert at the eAutoclub.com Support Desk, give us a call on out support number (310) 984-3501 xt 4, or suggest a new feature or improvement by emailing us at support@eAutoclub.com.Related Articles
How to Report an Accuracy Issue to Support
This article explains how to report accuracy problems in Service Intelligence's reports to support. STEP-BY-STEP FOR THE CLOUD-BASED APPLICATION This action is not applicable for this version! STEP-BY-STEP FOR THE DESKTOP APPLICATION Right click the ...How to Update a Billing Email Address in Cpanel
This article explains how to update your billing email address so that it receives invoices. If you are receiving invoices and they are not going to the correct email address, this will fix that issue. You first need to access the menu ribbon. To do ...How to Report Accuracy Issues
This article explains how to send an email of an inaccurate report to support in Service Intelligence. STEP-BY-STEP FOR THE CLOUD-BASED APPLICATION This action is not applicable for this version! STEP-BY-STEP FOR THE DESKTOP APPLICATION To report an ...How to Read the POS Detailed Report
About: The core strategy in building your business has to be to give the customer a superior service experience at the point of sale. Why? Because this is where we earn loyalty. SI sales automation is based on ultra accurate reporting is for the ...How to Add Vehicle Owner's Email to SMS and CRM
This article explains how to add a vehicle owner's email to SMS and CRM for Service Intelligence. STEP-BY-STEP FOR THE CLOUD-BASED APPLICATION Click here to learn how to email reports in Service Intelligence STEP-BY-STEP FOR THE DESKTOP APPLICATION ...