How to Opt Out or Opt In a Customer's Vehicle in Service Intelligence

This article explains how to change the opt in or opt out status of a customer or vehicle.
STEP-BY-STEP FOR THE CLOUD-BASED APPLICATION
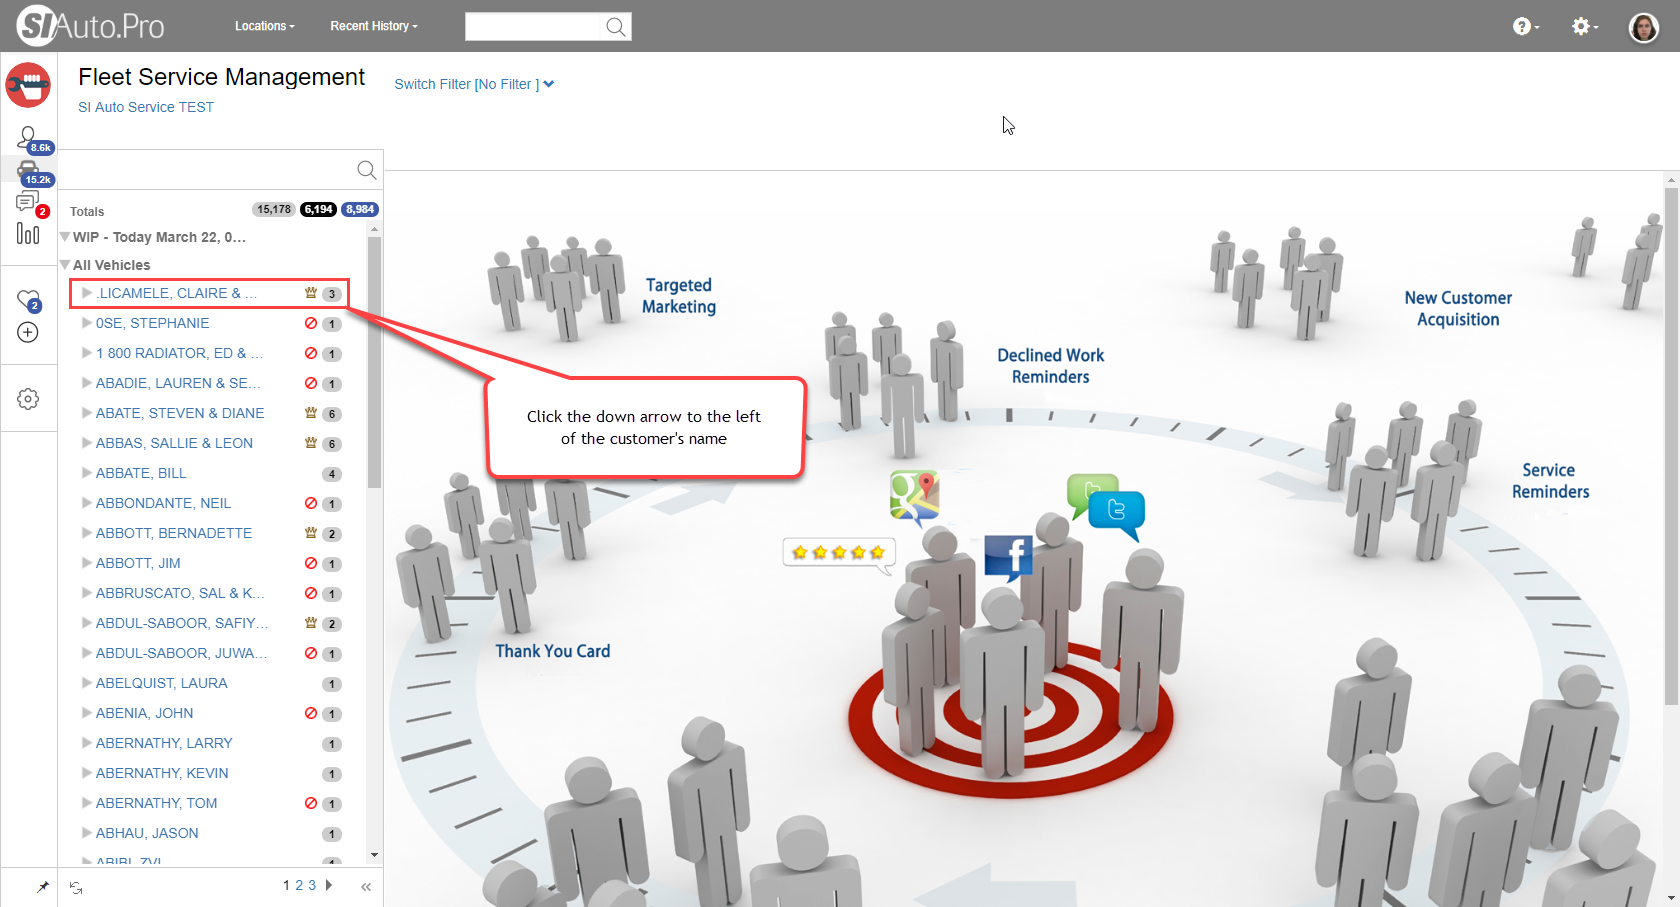
To opt in or opt out a customer or the customer's vehicle, click the down arrow next to the customer's name to show that customer's vehicles.

Pick the vehicle you want to opt out/in. If you intend to opt this customer out/in for all of them, choose any of the vehicles.
Pick the vehicle you want to opt out/in. If you intend to opt this customer out/in for all of them, choose any of the vehicles.
The progress report of the vehicle will open on the main page. Above the report, to the top left, you will see three icons. These icons indicate the opt in or opt out status of the vehicle. In the example below they are all set to opt in, as there are no do-not-enter signs in any of these icons.
The closed envelope is the opt in/opt out status for emails, the open envelope is the status for postcards, and the text bubble is the status for text messages. To change the status of any of these notification methods, left click the icon you want to change.
A dialogue box will open. You will notice that there is a checkbox next to the words Opt In/Out all Vehicles?. If you intend to opt out the customer entirely from receiving notifications through the method you clicked, check that box. If you only intend for the customer to not receive notifications through this method for this particular vehicle, leave it unchecked. To complete the status change, click Confirm.
You will see the new status for the notification method.
STEP-BY-STEP FOR THE DESKTOP APPLICATION
Left click the Opt-In icon from the menu ribbon to edit the opt in status of a customer or the customer's vehicle.
When you click the icon, the Contact Manager will open. You will be given the option to search by name or by email address.
To find the customer, type in the customer's name and click the Search button.
From the search results, click the plus sign next to the customer name to view the customer's vehicles. If you want to opt in or opt out every vehicle belonging to that customer's fleet, click the customer's name (it will be highlighted in yellow). If you only want to opt in or opt out a particular vehicle, click the vehicle instead.
To the right side is Set Contact Options. If the box next to a notification method is checked, the customer/vehicle is opted in. If it is unchecked, the customer/vehicle is opted out.
When you make your changes to the opt in or opt out status, you need to click Apply to save your changes.
This window will pop up when you have successfully saved your changes.
When you have finished, click the OK button.
Need more help?
You can always ask an expert at the eAutoclub.com Support Desk, give us a call on out support number (310) 984-3501 xt 4, or suggest a new feature or improvement by emailing us at support@eAutoclub.com.Related Articles
How to Edit Vehicle Odometer Showing in Service Intelligence
This article explains how to override the estimated odometer in Service Intelligence for a customer's vehicle. STEP-BY-STEP FOR THE CLOUD-BASED APPLICATION This action is not applicable for this version! STEP-BY-STEP FOR THE DESKTOP APPLICATION Left ...How to Report an Accuracy Issue to Support
This article explains how to report accuracy problems in Service Intelligence's reports to support. STEP-BY-STEP FOR THE CLOUD-BASED APPLICATION This action is not applicable for this version! STEP-BY-STEP FOR THE DESKTOP APPLICATION Right click the ...How to Modify Service Parameters
This article covers how to modify service parameters in Service Intelligence. The following goes over how to access your service categories, what parameters you can modify for each service, which items are being flagged by the service and which items ...Service Reminder - Start Automation
About: Contact automation is a condition-based part, lubricant and fluid alter system that automatically sends Service Reminder mobile optimzed emails. This article explains how to customize your offer and start automated daily delivery of Service ...Adding vehicle owners email to SMS and CRM
Click here to learn how to add a vehicle owner's email to SMS and CRM in Service Intelligence